
Step-by-step guide to integrate custom domain.
1
Open the right side panel menu
Open the right side panel menu by clicking on your profile picture in top-right corner.
2
Click on Custom Domain option
Click on Custom Domain option. You can directly open the settings by going to this link — 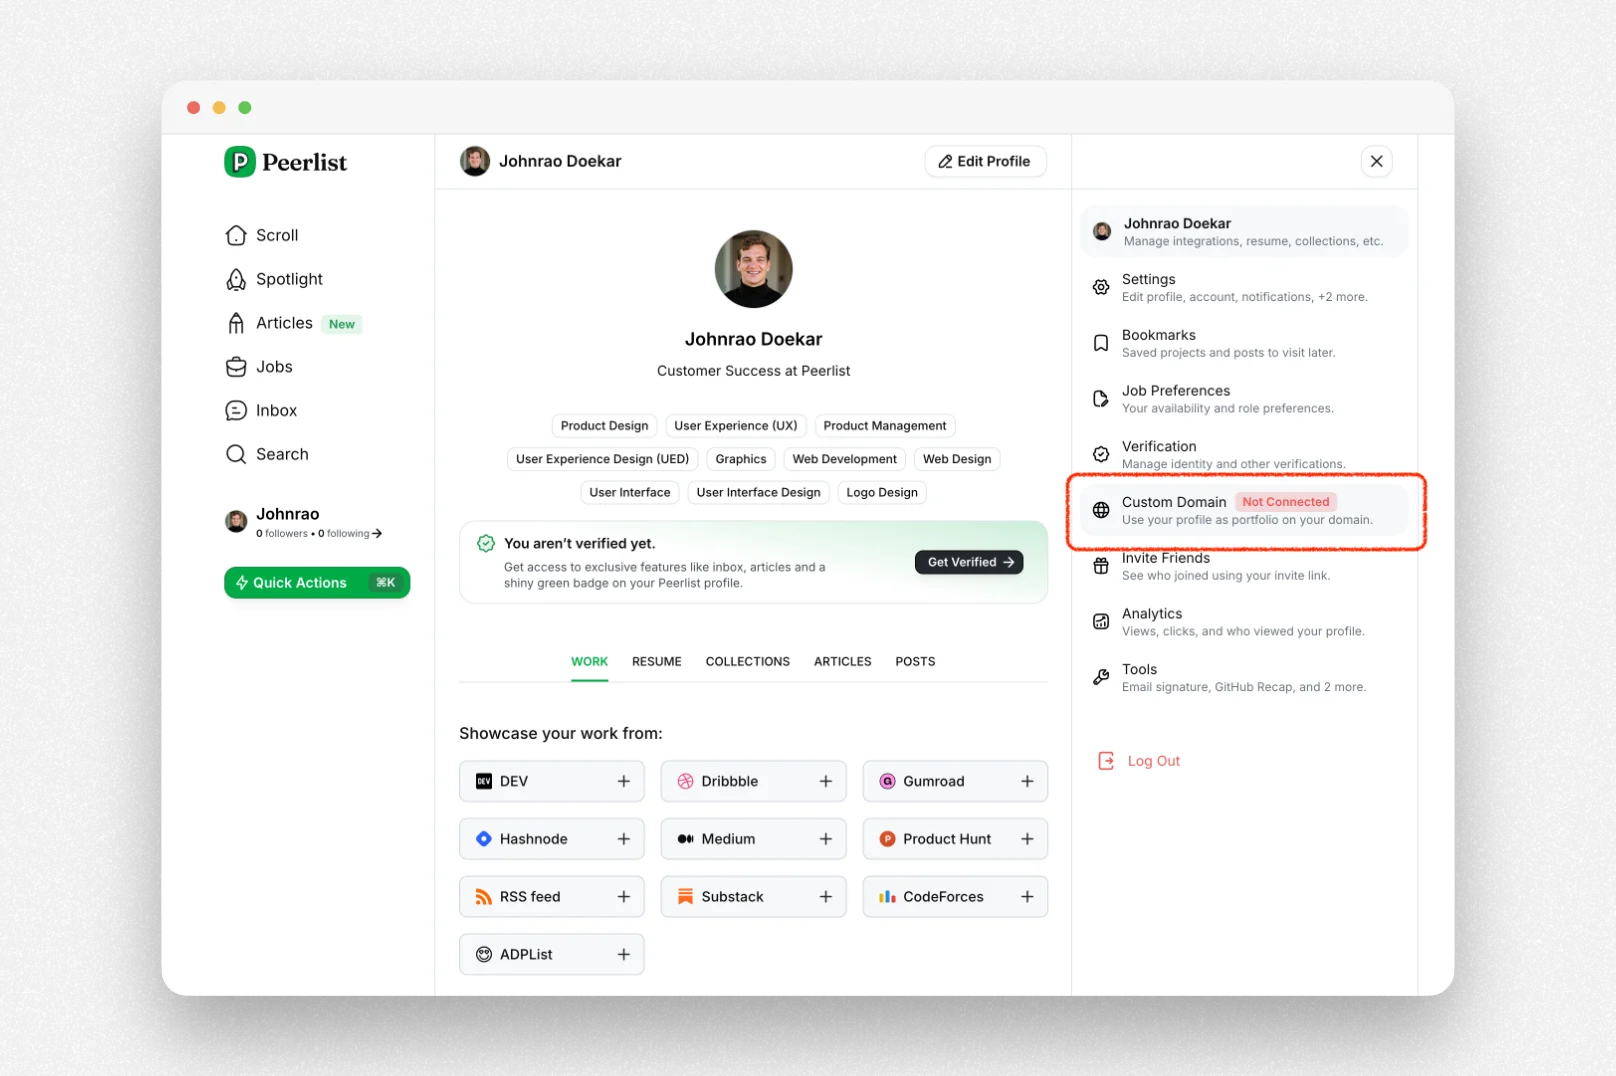
3
Enter your domain name
Enter your domain name and click on Add domain — You will be redirected to Stripe for payment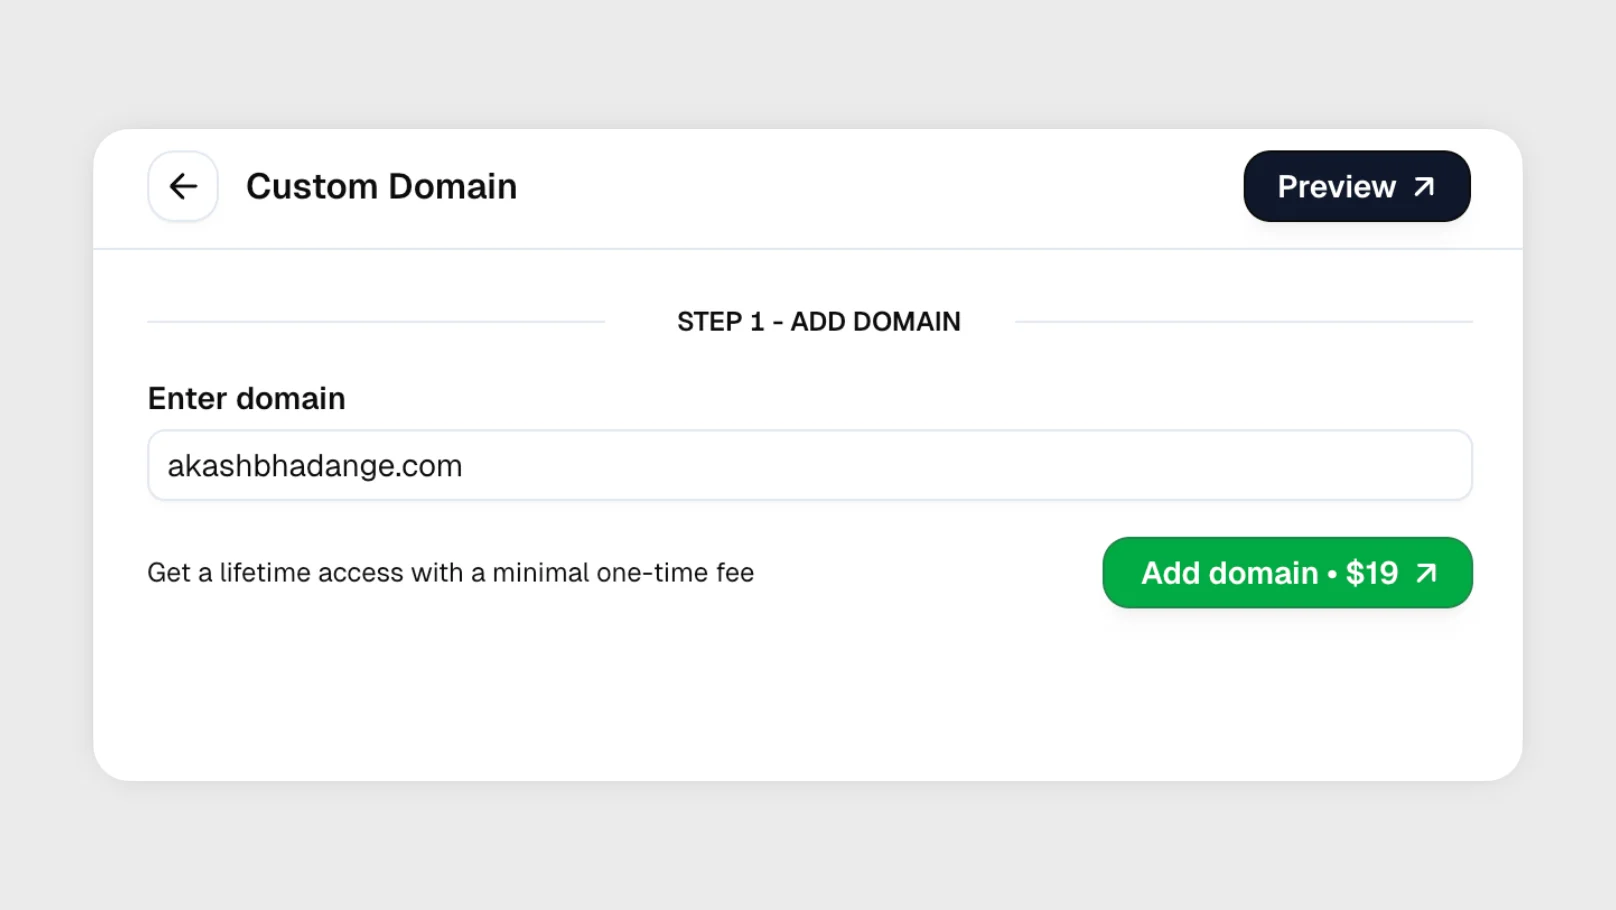
4
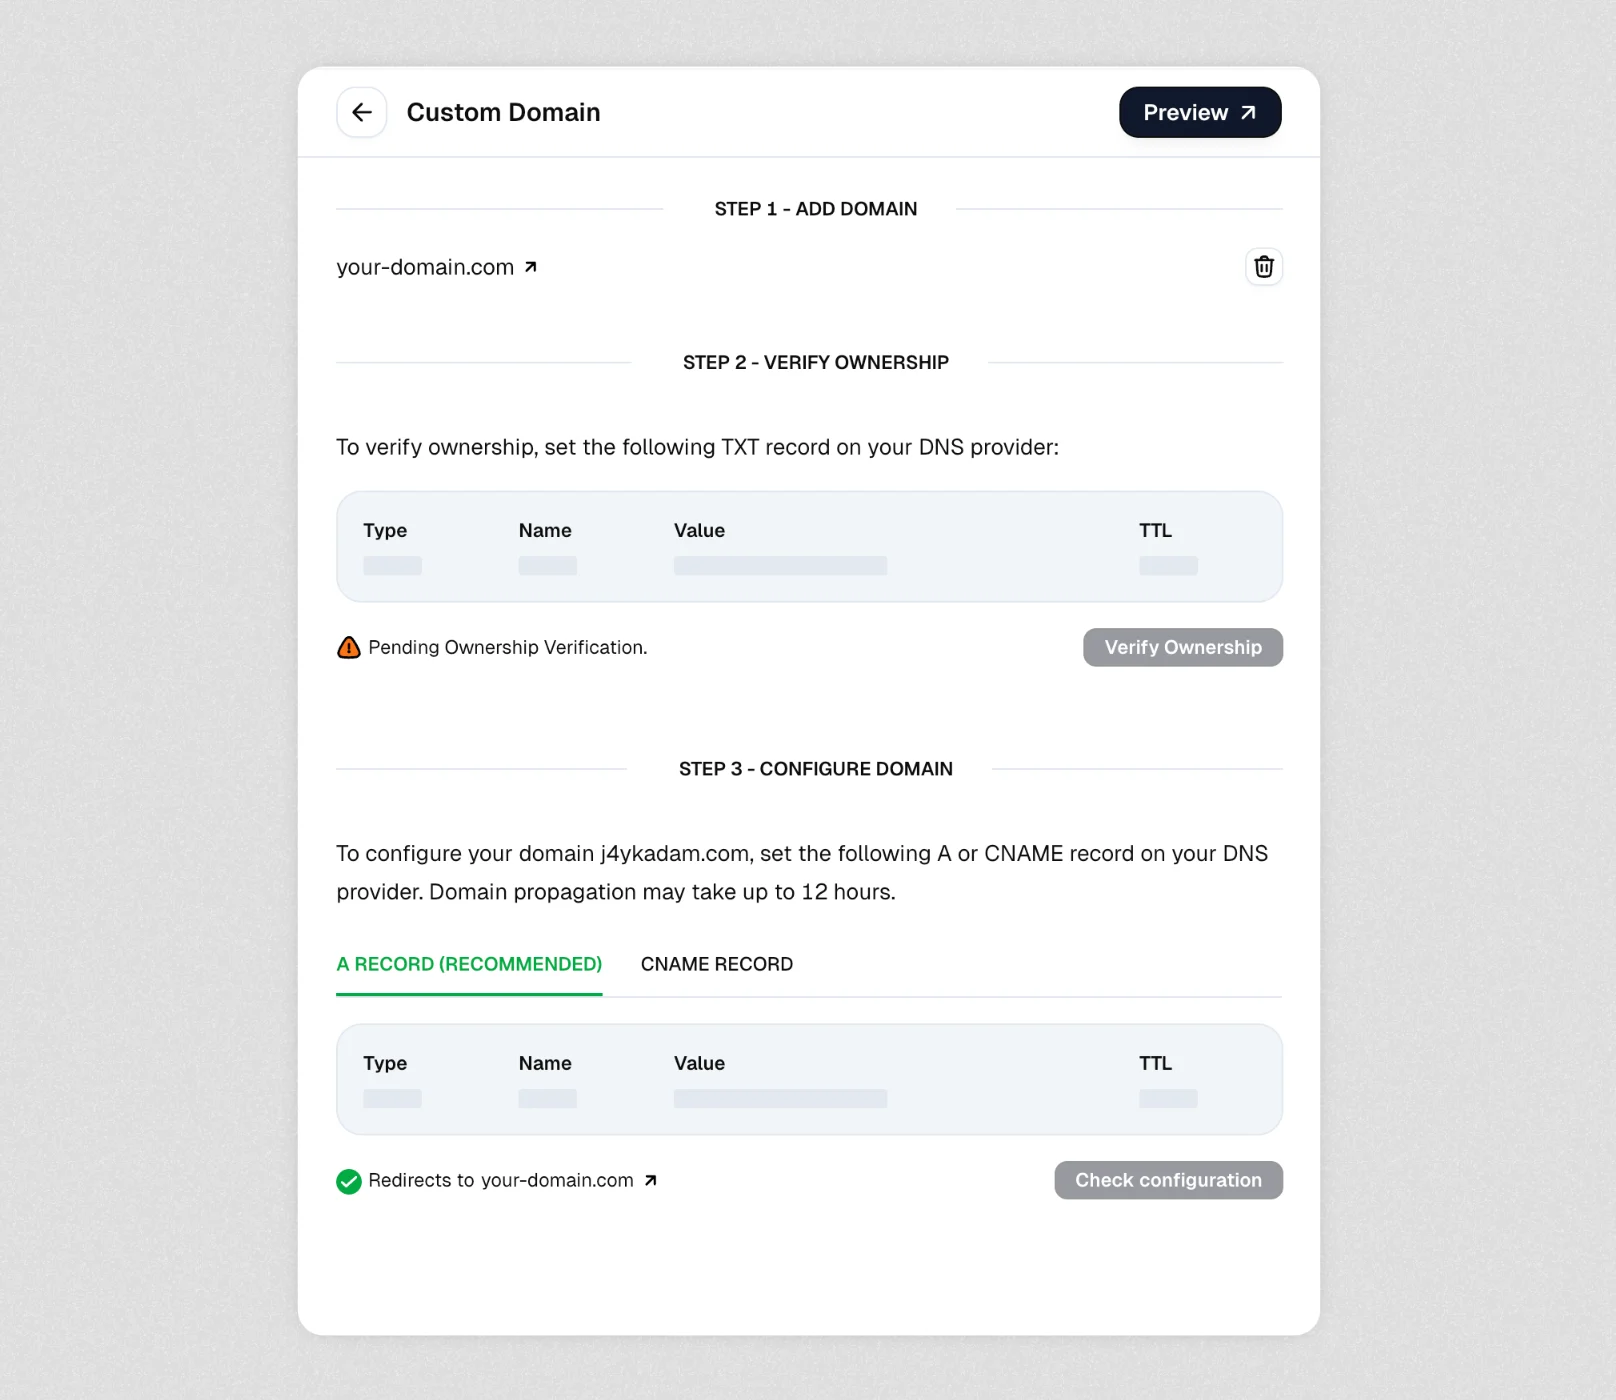
Verify domain ownership
To verify domain ownership, please add the TXT record to your domain. Once added, click on Verify Ownership.Note: It may take anywhere between 30-60 minutes for domain propagation.
5
Add A or CNAME record
Add A or CNAME record to your DNS settings. Once added, click on Check Configuration.
Troubleshooting
How to resolve this issue
- Disconnect your current domain: Click the trash icon (🗑️) located next to your domain name “http://your-domain.com” at the top of the page.
-
Reconnect your domain: Start the domain connection process again.
This will generate the proper TXT, A, and CNAME records needed for verification and configuration. -
Follow the three-step process:
Step 1: Add your domain
Step 2: Verify ownership by adding the provided TXT record to your DNS provider
Step 3: Configure your domain by adding either the recommended A record or alternative CNAME record.